Click Customer > Groups button
Customer groups allow you to allocate 1 customer record to more than one group. This helps you filter the list and find and display customers who meet the group's criteria. Unlike customer types you can assign a customer to multiple groups.
Add Groups
From the customer screen:
1.Click the Groups button
2.Click the Define Groups button (the list will be empty to begin with)
3.Click Add to add a new blank row.
4.Type in a group title and the name.
The example below uses 2 group titles and 4 group names, where the title is either the type of room purchased or type of room the customer is interested in and the group names are the rooms.
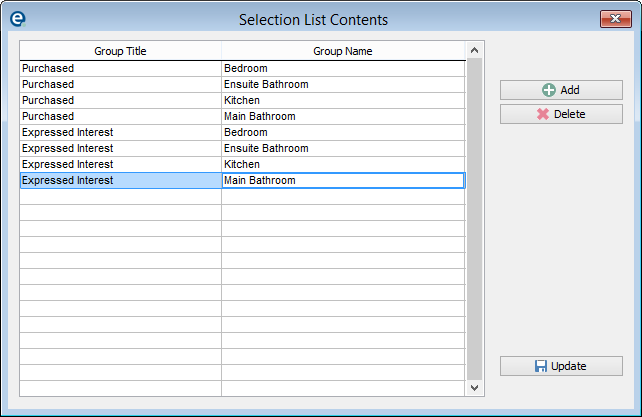
5.Once you have defined the groups click ![]() Update. Your list of titles and names will be clearer now it is listed as below:
Update. Your list of titles and names will be clearer now it is listed as below:
6.Click ![]() Update to save and close the list of groups. You can return to create new groups at any time.
Update to save and close the list of groups. You can return to create new groups at any time.
Assign Groups
To use the filter on groups you must assign customers to one or more groups.
1.Complete the steps above to add groups.
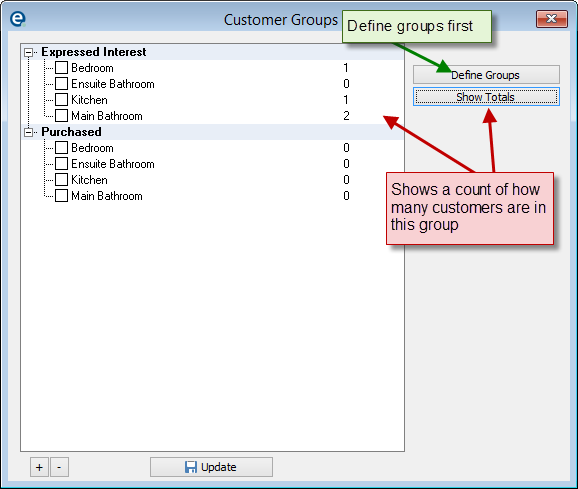
2.Locate a customer record and click the Groups button.
3.Tick the box to place a X in the box next to each group that you want to add the customer into.
4.Click ![]() Update to save and close the window.
Update to save and close the window.
5.Repeat this for all the customer records as needed. Don't forget to assign groups to new customers as you create them.
Filter Groups
The advantage of groups comes when you want to show a customer list that matches a particular criteria. Using the example below we could filter the list to show all customers who purchased a main bathroom.

Simple
1.Open the customer screen and click the Select Groups button. This opens the filter builder window.
2.Pick your criteria from the drop down box at the top and click the Insert button.
3.Click OK to close the window.
4.Click the Filter List button and the list of customers now only shows those customers that are in the chosen groups.
Advanced
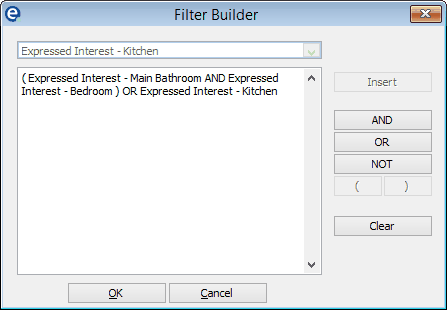
The example above uses only 1 group. You can make filters that contain multiple groups and build up rules with them. E.g. a) "Purchased Main Bathroom OR Bedroom" b) "(Interested Main Bathroom AND Bedroom) OR Kitchen"
The rules are built up in order by picking up your group from the drop down box and clicking Insert. Use the buttons on the right to add in the operators AND, OR, NOT or include brackets so that the brackets are processed first then the rest of the rule.
Because the groups are a filter you can use the groups criteria in conjunction with the other filters. E.g. if you have a branch location prompt you can select that and then use the groups and then filter all to see just customers who have purchased particular rooms from a particular branch.
The more groups and criteria you set up the more powerful and useful the groups become.