Click the ![]() Cab Builder icon > select a furniture catalogue from the drop down list on the left > click the Product Settings button underneath
Cab Builder icon > select a furniture catalogue from the drop down list on the left > click the Product Settings button underneath
In Product Settings, we link all of the set-up we’ve done to the actual products within your catalogue. Select an item from the list on the left to see the settings for it on the right.
In the example above, we have selected the BD100. On the right hand side, the first tab, or group of settings, is Modifiers. These are the modifiers that are linked to this unit & can therefore be adjusted at Unit level on a Quote or Order. These modifiers also allow a different Default value to be set against this particular unit, for example a Larder Unit may have a different Shelf Quantity value than a base unit.
You can also set Min & Max values here, and change the surcharge applicable to each modifier, just for this unit, should you wish.
Additional Unit Level modifiers can be added by clicking the ![]() Add button at the bottom.
Add button at the bottom.
Accessories
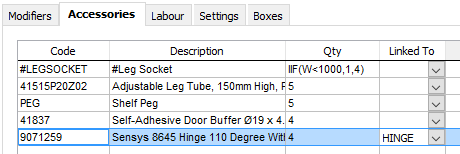
The next tab is Accessories. Here you can set which accessories are applicable to this unit – these are sometimes known as a “bill of materials”. Accessories can be added or removed using the Add & Delete buttons - don’t forget to put a quantity next to each one so that EQ calculates the correct amount (this can be a formula instead of an exact number).
You can also link Accessories to Modifiers:
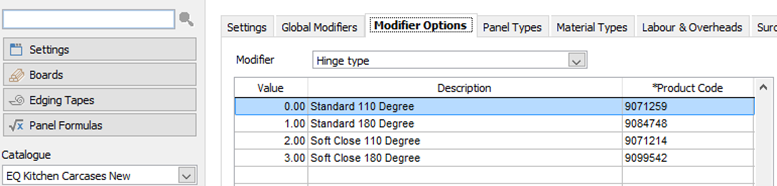
In the example above, the unit is set to have a Modifier called “Hinge Type”.
The Modifier is set as a pop-up selection, and linked to each option is a product Code (see Global Modifiers). This means that depending on our selection of the modifier at Quote/Order level, this will determine exactly which product/s to use as accessories.
Labour
The middle tab is Labour. This is where you can allocate your labour and machining costs against the unit.
Click ![]() Add at the bottom to allocate a labour cost against a unit – remember to fill in the quantity for each item.
Add at the bottom to allocate a labour cost against a unit – remember to fill in the quantity for each item.
Labour costs can be used to calculate the total cost of a unit, should you wish to use the in-built price calculator.
Settings
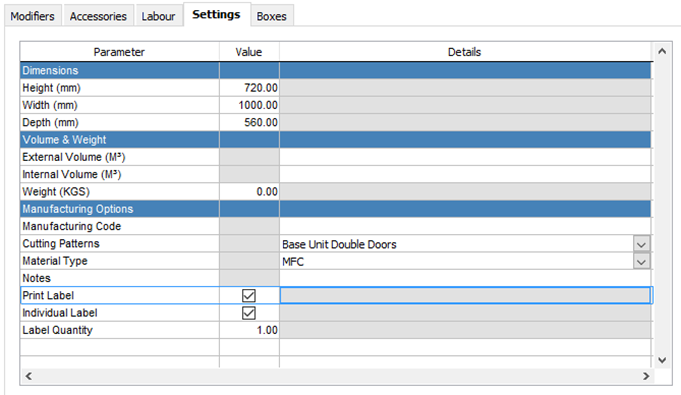
The second-to-last tab is Settings.
This is where you will link your Cutting Pattern to each Item within your catalogue (without a cutting pattern, there will be no panel list on the Production Papework), choose what sort of material this item should be made out of, and choose whether or not you want to print labels for this item.
Boxes
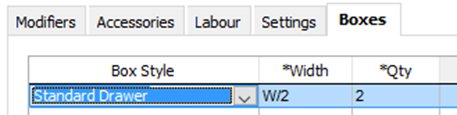
The final tab is Boxes. Here you will assign the style, width & quantity of drawer boxes for this item. Not all items will require drawer boxes.
Note that Width & Quantity don’t have to be exact figures – they can be calculations. In the example, the Width of the drawer box is “W/2”. This will calculate the overall width of the drawer box to be half the width of the unit, so if the unit changes width then so too will the drawer box.
Tips!
Right click on an Item’s code for more options. This allows you to copy & paste (replace) or Add to other units’ settings.
This allows for quick adding of a modifier against all Base Units, for example.
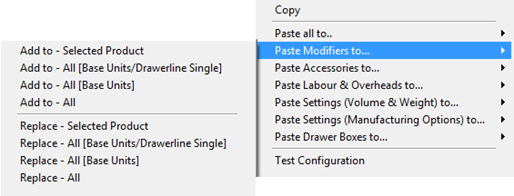
Use the Test Configuration option to easily check all configuration options without needing to begin a quote and change options there.