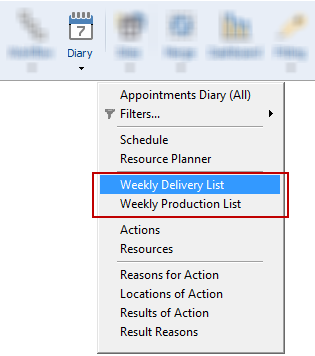
Open the Weekly Delivery List or Wekly Production List with the arrow under the Diary button:
Click the Configuration icon on the left. Most of the settings you apply in here will affect both the Weekly Delivery AND the Weekly Production Lists.
General tab
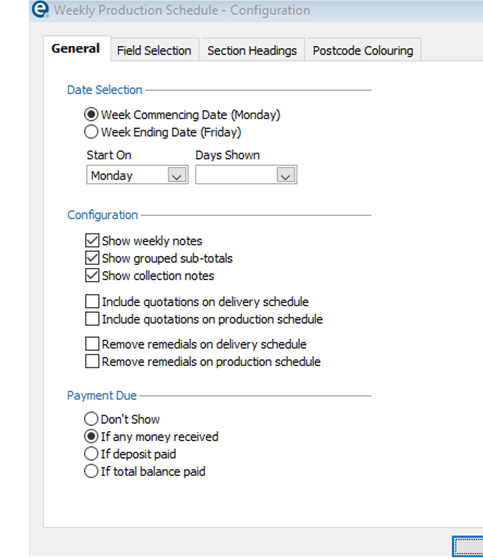
Date Selection
Week Commencing or Week Ending Date
Select the default behaviour for the date search to either commence on the date you enter, or end on the date you enter.
Start On
Defaults to Monday and you can change the beginning of the week
Days Shown
Select the number of days in a "week"
Configuration
Show Weekly Notes
You have the option to show Weekly Notes (the notes section at the top of the screen, as described above).
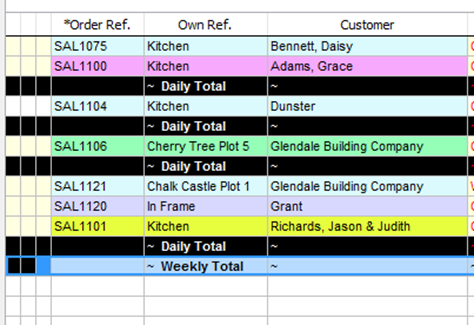
Show grouped sub-totals
This will show a total number of cabinets to be made each day. Totals show in a black horizontal bar under each day labelled Daily Totals
Show collection notes
Tick to include collection notes as well as sales orders.
Include quotations...
Tick to include quotations as well as orders. This will require a quotation to have been accepted, and reset, in order for them to show (otherwise a quotation will not have a delivery or production date in order to be included).
There is a setting for each of the delivery schedule or production schedule
Remove remedials...
Tick so that remedial orders will not show with the list of orders. There is a setting for each of the delivery schedule or production schedule
Payment Due
Payment due requires you to have a payment term configured with the word “Cash” in it against the customer record. (See the Accounts tab of the Customer screen).
Orders will show up in red text if the criteria has not been met. (See also: payments)
Field Selection Tab
These tabs allows you to choose which columns of information are seen on the Weekly Lists.
Tick the Columns that you wish to show on the screen. Check through the Order Details, Milestones and Headings tabs.
Note that you can drag and drop columns on the weekly list to put them into your own sequence.
C.O.D. Flag (Cash on Delivery)
This flag will show a symbol next to an Order if the customer has “Cash” in the description of their payment terms AND there is a balance outstanding on the Order.
Section Headings
You can configure your own manual production checklist for each order. These are the small red columns on the main screen of the weekly list.
The defaults are:
•Order Acknowledgment,
•Board,
•Cut,
•Edged,
•Drilled,
•Assembled,
•Despatch Complete
•Invoiced.
You can add your own in here or rename the customisable ones that are already there.
Ensure each has an abbreviation for the column name, give it a description and choose whether or not you wish it to complete a Milestone in the Projects > Sales Orders screen once you have marked it as having been completed.
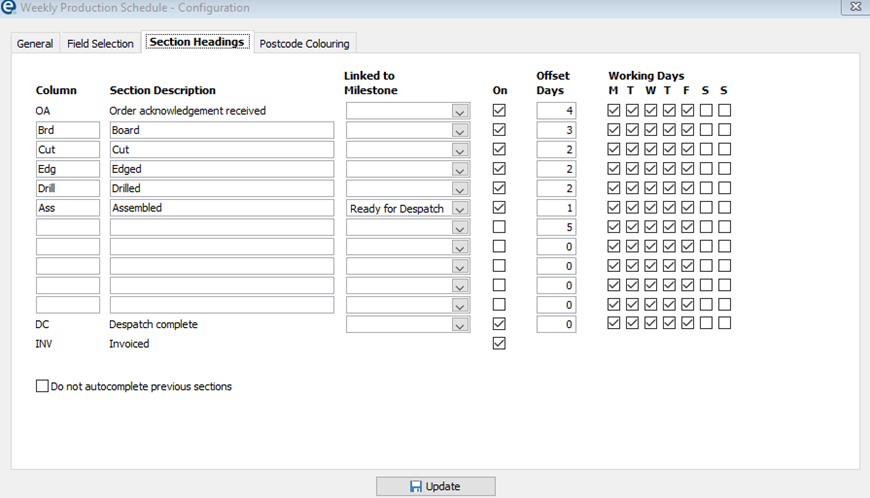
In the above screen, we have created a milestone in Projects > Sales Orders called “Ready for Despatch” (See milestone setup). Once the Assembled check has been completed on an order this will mark the milestone as being complete.
This can be useful to alert other users that might not need to use the weekly lists, but do use the projects > sales orders screen.
On
Tick the box for On to show the check on your screen
Offset Days
Set how many days you want the check to be offset by (how many days prior to delivery of the goods, before the check turns red).
Working Days
Choose which days you wish to set as Working Days (to be included as the offset days) for each of the different checks.
Completing Previous Sections
EQ will assume that each of these checks is sequential, and so if you complete the “drilled” check then EQ will automatically complete the previous checks, starting with the first one that you can manually amend (by default, this is Board).
If you do not want EQ to complete the previous checks for you, tick “Do not complete previous sections” at the bottom of this screen.
Postcode Colouring
If you deliver to many different parts of the country, you can choose to colour code Sales Orders on your Weekly lists based on the Delivery Postcode.
Tick the box to turn it on or off, then right-click in the colour box next to the corresponding postcode. Select your required colour and click OK.
Orders will now be shown in the colour based on the Delivery Postcode.
Be sure to close the weekly delivery/production list and open it again to save and update your preferences and see the colour coding.
These settings relate to the delivery summary view which offers a drag and drop interface.
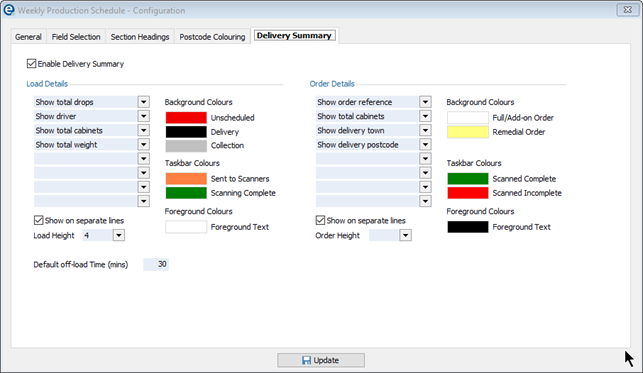
You can configure the scheduling view with your own colours for statuses and select the text that appears on each of the boxes.
Open the Weekly Delivery List then click the Configuration button on the left. Pick the Delivery Summary tab to view the below:
Enable Delivery Summary should be ticked in order to access the drag and drop view.
Load Details are the boxes that act as headers for each load. Click the drop downs to show up to 8 different pieces of information about the load.
Order Details are the text boxes that represent each order. Click the drop downs to show up to 8 different pieces of information about the load.
Right-click on the colour swatches to change the colours that are set for each status.
Taskbar Colours represent the small bar that shows at the side of the box. That represents the scanning status. Load is showing below, on the left it has been sent to the Despatch App, and on the right all scanning has been completed.

Load/Order Height sets how many rows high the load/order boxes are. If you select multiple text fields you may need to increase the height so you can see all of the text on the boxes.
Default off-load time (mins) is a value that can be added into every drop to make the estimated time more accurate. You can apply the default time quickly to all drops, and when scheduling a load you can adjust the off-load time for every drop.