The Delivery Summary View is shown by using the view options in the lower left hand corner:
To show the summary view alongside the grid view select either of these 2 split screen buttons:
![]()
To show the summary view full screen click the left most button:
![]()
If you cannot access these views you need to enable the summary view. Click Configuration on the left, then pick Delivery Summary and tick Enable Delivery Summary.
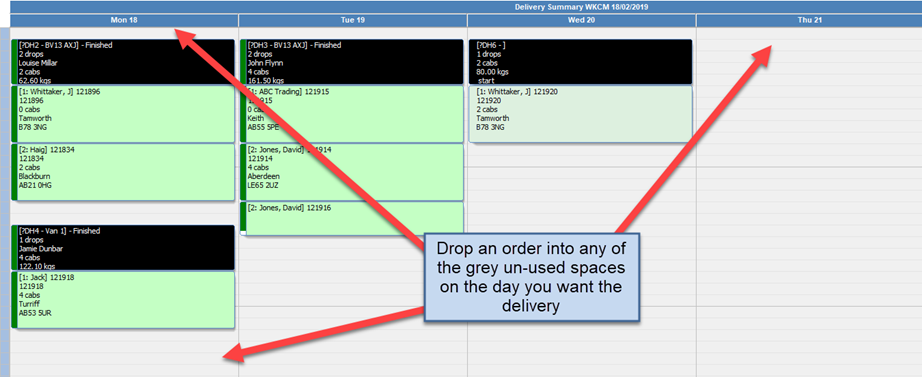
The drag and drop interface looks like this:
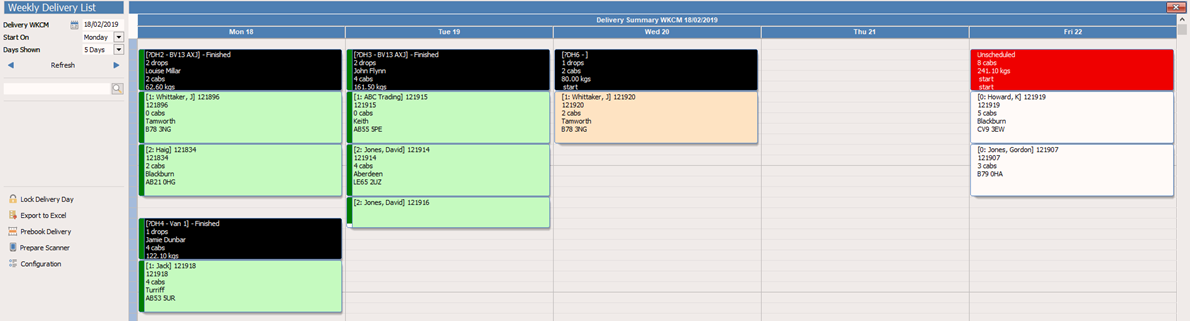
The black rows are load headers with the coloured boxes underneath each order. Manage your delivery loads by dragging and dropping orders. When orders are dropped under loads they gain a drop number which you can then click and drag to re-arrange your deliveries. In the example above…
Monday: there are 2 loads for different vehicles. On the first load there are 2 orders, and 2 drops. Underneath there is another load with 1 order and 1 drop.
Tuesday: there is 1 load with 3 orders but 2 of the orders are for the same delivery postcode so it is shown with a smaller box. That shows as just 2 drops.
Wednesday: there is 1 load with 1 order and 1 drop. It is a different colour because it has been scanned on to the delivery van but not yet scanned off at the delivery location.
As you progress through the steps in the Despatch App, scanning barcodes, the status of the order and drop is updated on this screen by colour changes.
The red rows are headers grouping together unscheduled orders which are in the white boxes.
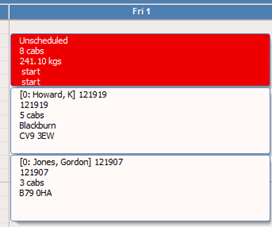
Friday: shows 2 orders both unscheduled. This is because they have a delivery date for Friday but have not been scheduled with any more detail.
To change colours and other options click the Configuration button on the left and see this help topic.
Unscheduled Jobs
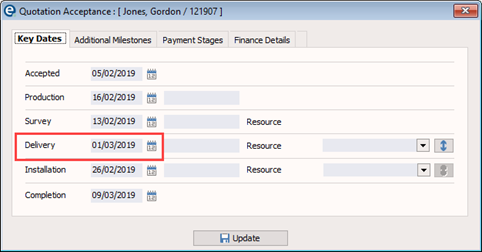
All sales orders appear on the Weekly Delivery List when they have an estimated delivery address set. This is done in the Accept screen / Order Details screen shown below:
Orders initially appear on the delivery date selected as Unscheduled as shown below:
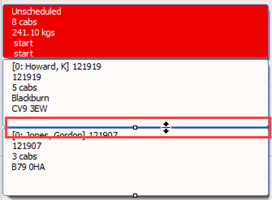
You can click the top handle of an order to drag it and move it between days. The cursor changes to a double-headed arrow as shown below:
To schedule an order onto a new load, drag its handle onto a clear grey part of the day you wish to schedule it. Either the top row or the bottom of the day.
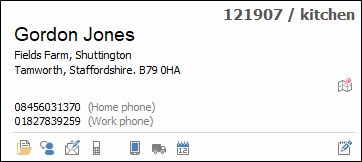
On the Delivery Summary screen you can open a order and view other shortcuts. Double-click on an order’s box to show the below shortcut card:
The buttons are:
|
Customer folder |
Click to open the customer folder (the same as opening from the customer screen). It will contain the despatch photos if you selected that option in the Despatch Processes Setup (page 6). |
|
New Communication |
Creates a new entry in the customer communications tab (formerly Contact History). |
|
New Email |
Creates a new email to the customer including picking from the email templates (you can use order merge fields in the templates). |
|
New Text (SMS) |
Creates a new text message to the customer including picking from the email templates (you can use order merge fields in the templates). |
|
Scanner Info |
Shows the item and order level progress from EQ Despatch App. |
|
Delivery Note |
Print a new delivery note for the selected order. |
|
Order Details |
Shortcut to the order’s Accept / Order Details screen where you can update all the key dates including the customer delivery date. |
|
Open Order |
Shortcut to open the sales order in full. |
|
Google Maps |
Options to Locate.. or Navigate to.. the customer’s delivery street or postcode. |
Scheduling a New Load
Open the Weekly Delivery List screen and show the full view summary.
Click the top handle of an order and drop it onto a new empty grey space. The New Load window will open:
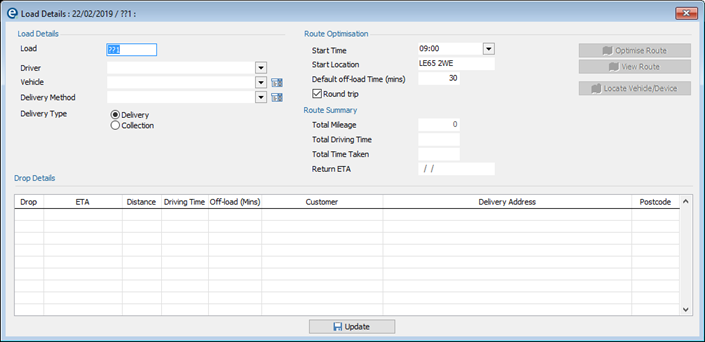
Specify a load number at the top left. This should be unique at least to the week. It can include any alphanumeric characters, so could also include a vehicle specific identifier. Complete the other options from the drop down boxes: Driver, Vehicle, Delivery Method and set a delivery type.
Press Update when you have completed and you now have created a new load with 1 order and 1 drop which will look like this on the delivery summary:
Edit Load Information
Double-click the load header to open the same screen if you need to make adjustments or perform route optimisation (see page 9).
Click Update to save changes to the load.
Adding Orders and Drops to Loads
To add further orders to an existing load, drag the order’s handle and drop it underneath the existing order(s) (shown below left)
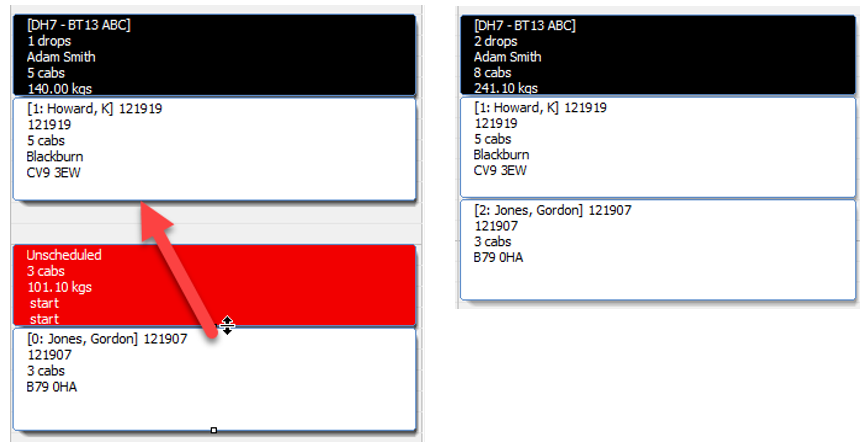
It will automatically become drop 2 (as above, right)
You can click and drag the handle to re-arrange the sequence and the drop number will change automatically. Drag the handle and drop it over the middle of 2 existing drops and it will insert itself.
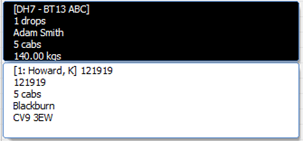
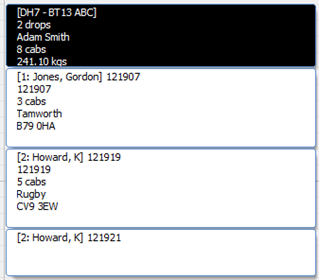
By default a new order will create a new drop. If you schedule 2 orders that have the same delivery postcode you can drop one order directly over the top of the original order, and it will become part of the same drop. The image below shows 2 orders on drop 2:
Once you have more than 1 order and/or drop arranged you can use Route Optimisation to offer a better sequence.